

Timeline entry help
IMAGINE BALLARAT EAST: A new local area plan for Ballarat East, driven by the local community
.jpg)
Timeline additions have been added especially for HUL using existing infrastructure. This is a how to guide to cover what isn't covered in the other help documents for Content Builder.
Click on a heading to expand the section.
Add a timeline entry
- Login to the HULP account in Content Builder.
- Click on 'Resources' in the menu bar.

- Click 'Add New resource'.

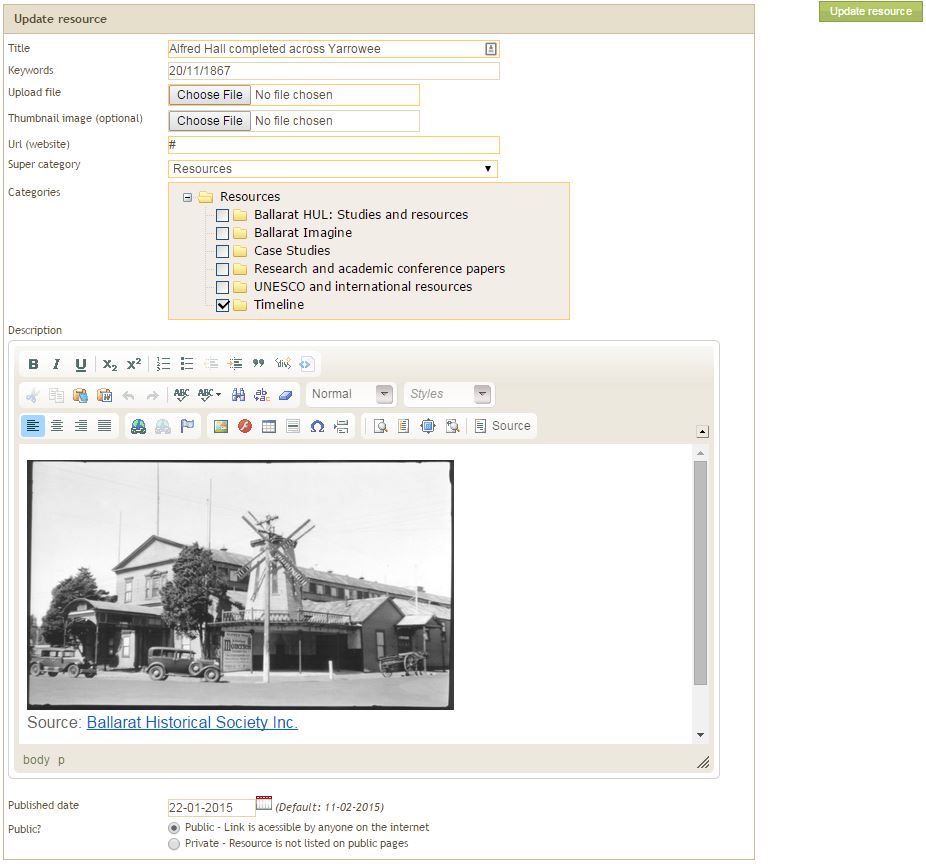
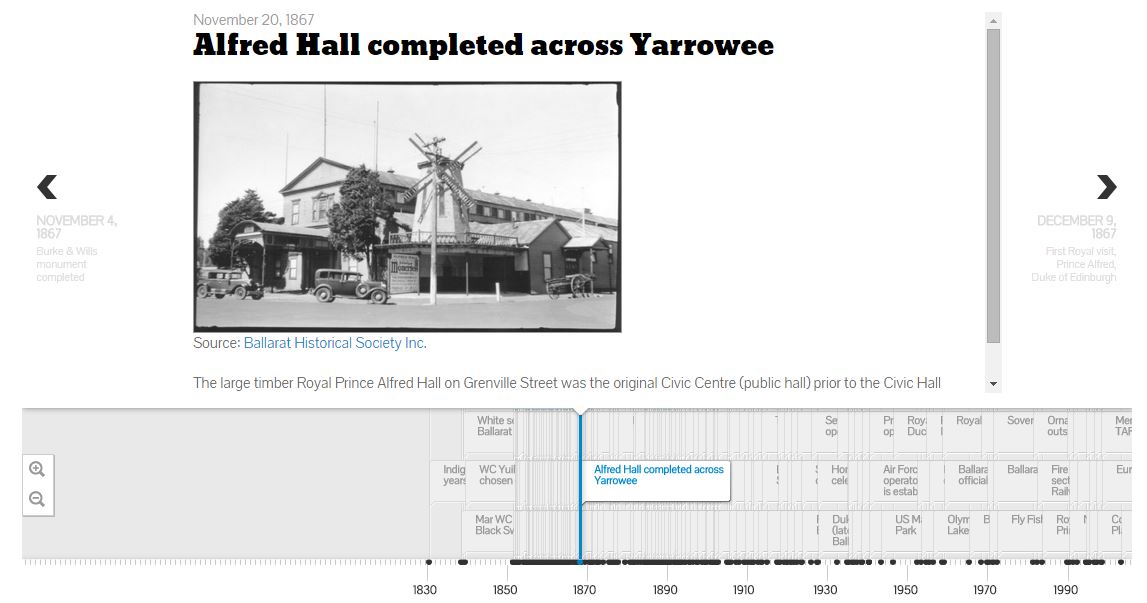
- A screenshot of what your entry screen will look like is below. Underneath that is a screenshot of what the timeline will look like.
- Entry
- Title: Keep this text short
- Keywords: This is where the date goes. Format dd/mm/yyyy.
- Url (website): You need to put a '#' here otherwise it won't update.
- Categories: Click on 'Timeline' box.
- Description: Add in photos, text and links.
- Once this is filled in, click the green 'Update resource' box on the right hand side.
- Check your timeline entry at https://www.hulballarat.org.au/timeline.php to ensure it displays correctly.
Edit a timeline entry
- Entries are listed by title in alphabetical order.
- Login to Content Builder, go to 'Resources' tab and click on the '+' next to the 'Timeline' folder to expand.
- Right mouse click the entry you would like to edit.
- Click 'Edit Resource' and edit as per above.
Remove a timeline entry
- Deletion is permanent.
- Login to Content Builder, go to 'Resources' tab and click on the '+' next to the 'Timeline' folder to expand.
- Right mouse click the entry you would like to delete.
- A confirmation box will come up, click OK to delete.
- A box will come up 'Resource deleted successfully'.